SPRING, PICNICS AND PRETZELS

Ahhh. FINALLY some days of sunshine on the streets of NYC. I forgot what it’s like to wear sunglasses. Only 6 weeks ago I was taking pictures of snowy paths in Central Park, and yesterday I was able to wear a short-sleeved T! (Briefly though, as it was still chilly, but hey, I’m not complaining)…
I always find it amusing to see the mood change in people. Everyone’s so cheerful and happy; you can actually see it as they walk by. And of course, it’s a perfect weather for a walk in the park – and a picnic. With Central Park’s recently opened lawns, it’s a great hangout for meeting friends, plus it’s a nice change than those stuffy dark bars… 🙂

MARKETING NATURE
Do parks need marketing? I would argue that they do. With spring out, many people are looking for outdoor activities, and there are so many of those in NYC! Every second neighborhood has its flea/food/music festival, and the park is just another option out of many. The NYC Park Department has tons of fun events – free movie screenings, concerts and shows, and of course Shakespeare in the Park – but these are yet to come and are mainly during summer, which makes sense because spring just started so the weather is still volatile and the trees are still leafless. But! Apparently there’s still events going on – although it would probably be more appealing to you if you have to entertain a few kids around the house…

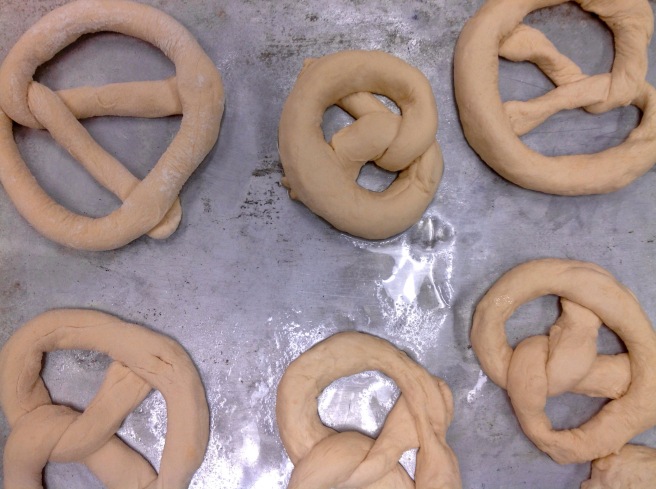
That said, I think that my favorite park activity – picnicking – doesn’t need any marketing 😉 It’s so tempting on its own! And of course, my picnics always have a homemade touch to it, so it adds a little extra fun to the experience. I usually buy some really good bread and make yummy spreads to go along with it – pesto, almond paste and olive spread, but this time I felt like going the whole nine yards and make my favorite kind of baked good: New York style soft pretzels.

DID SOMEONE SAY PRETZEL?
Guilty! I love anything doughy. I don’t know what I would do I was gluten intolerant! Pretzels are pretty simple to make, and it tastes divine, but many people find it fussy and therefore don’t attempt it at home. If you’ve ever dealt with yeast before, this should be pretty easy. And if you haven’t, a word of ‘wisdom’: yeasty dough is a friend, and a pretty yummy one too! You won’t screw it up that easily. 😉
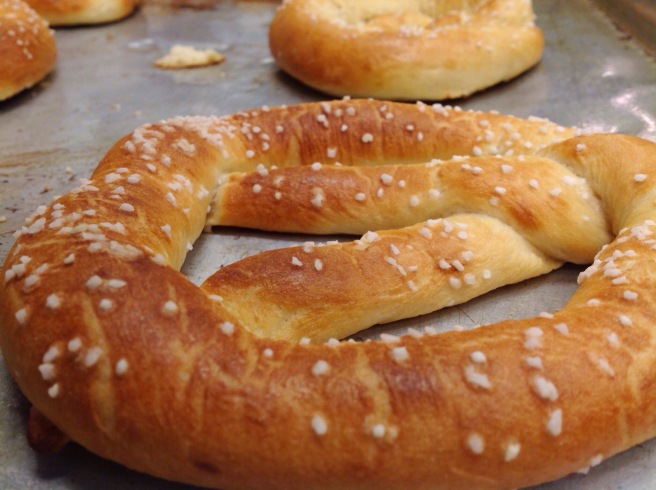
The only difference in the process with compare to a regular yeast process, is that you need to poach the pretzels in water before you bake it; this will give it its signature shine and beautiful golden color as it bakes. And if you ever poached an egg – this shouldn’t be too hard!
Special ingredient alert: in order to get the full NYC Pretzel effect you’ll need pretzel salt (yes, the salt is actually called after this baked good!), which you can find on amazon or in specialty stores. And if you have high gluten flour, it would yield an even more chewy pretzel thanks to the high gluten content.

IMG_1852

ADDICTIVE NEW YORK STYLE SOFT PRETZELS

 From the Pantry:
¼ oz (one envelope) dry yeast
1 pint warm water* (see comment)
2 oz / ½ stick butter, cold
1.5 pounds (3 1/3 cups) AP flour (high gluten flour is preferred if you have it)
½ oz (~2.5 teaspoons) salt
Optional: 1 tablespoon Tabasco

*Warm water: the rule is, if it feels nice n’ warm to you, it would be nice n’ warm for the yeast. Do not use boiling water and not even close! It would kill the yeast and would ruin your mood when the dough will not rise…

 For Show:
Pretzel Salt

 Get Mixin’:

  1. Combine yeast and warm water; stir to dissolve.
  2. Cut butter into flour until fully incorporated; this could be done with a food processor, which would make it easier but would result with more dishes to wash 😉
  3. If doing this manually, combine flour mixture, yeast mixture and all other ingredients in a bowl, mix and knead to form a smooth dough. If using a stand mixer, do the same – only the mixer would be doing the kneading for you.
  4. Cover bowl with plastic wrap and allow to rest for 15-20 minutes.
  5. Divide the dough into ~5 oz pieces the size of a small tennis ball), and roll into 24’’ long cylinders.
  6. Form into a pretzel shape: make a “U”, cross the ends and flip the cross over the lower curvy side of the U. Look at this cool shaping guide I found online:
Pic credit: Breadmachinedigest.com
  1. Cover pretzels and proof in a warm place for about 15-20 minutes.
  2. Heat oven to 400fF.
  3. In a wide pot, boil water and reduce to a simmer. Poach pretzels in water 30-40 seconds and remove to a cooling rack to discard excess water. Strew with pretzel salt.
  4. Prepare 1-2 sheet trays with parchment paper, and spray lightly with oil.
  5. Arrange pretzels on trays, and bake 15-20 minutes, or until deep golden.
  6. Cool on rack.
  7. Try not to eat it all before you get to your picnic!

IMG_1870

Nutella, Pretzels and Shortbread. This is gonna be good

So this week was the Jewish holiday Purim. It’s the equivalent of Christian Halloween Costume wise. Unlike Halloween – there’s no trick-or-treating, but we have something else: it’s a mitzvah to drink until you drop. Yes, you’re reading correctly. Gotta love this holiday.

HOLIDAY TRADITIONS
Another thing about this holiday is that it’s customary to give your friends and family a goody-bag filled with candy and the traditional cookie – Hamantaschen, which literally translates as ‘Haman’s ears’ (did you really think we’d let a holiday go by without something to nosh on?). It’s also customary in a large crowd to have a raffle deciding who this goody bag will go to. I can still remember a school table packed with bright yellow, green and red cellophane-wrapped parcels, each with our name on it (noting who made it), and the raffle that followed. My best friend’s mom used to make the best bags, but somehow I was never the one to receive it.

BACK TO THE COOKIES
These are a kind of shortbread cookies filled with all kinds of yummy filings; the traditional version calls for a poppy seed filling, but you can fill it with whatever you want – chocolate, halva, peanut butter, etc. you can go savory too, of course, but this is a whole other discussion… So we’ll stick to the sweet part, if it’s ok with you.
The only thing you should look out for is making sure that it’s thick enough so it wouldn’t leak out of the sides of the cookie which can cause it to open and ruin the whole nicely-shaped-triangle you were working so hard on. The rule is: if you spoon a little on a plate and it keeps its shape – spreading just a little, you’re fine. If it flattens up – not so much. So how do you fix it? All you need is something to absorb the extra liquid.

PRETZEL TALK
Say you want Nutella filling (I know I do). Very runny. But you still want it. What you can do is add a thickening agent – which in this case is much easier than making roux, dissolving cornstarch etc.: to get the desired consistency, an addition of crumbled cookies, day-old pound cake crumbles and so on would work perfectly. In my filling – being a sweet-and-salty gal myself – I decided I want to try adding crumbled pretzel sticks.

IMG_3268

BRAND DROPPING
Wow, Snyder’s of Hanover. Great job well done on your recipe tab. I didn’t quite expect it, given that the snacks category tends to sometime overlook the foodie recipe-searching community, but you did great with all the different options. The site goes from your usual suspects of pretzel bread-crumb alternatives through finger food to main course and dessert with lots of navigation options, and offers many recipes that actually include the product itself. Lots of topping-things involved, but many variations, so I’ll give them that. I also looked at Rold Gold’s website – another FritoLay brand (remember them from last time?). I guess being part of a larger group of brands can sometimes mean being in the background. There were only 5 recipes dedicated to the brand, 3 of which did not involve the use of the product itself. Maybe FritoLay considers the brand a ‘Milking Cow’ and does not want to invest too much into it. Whatever the reason, it could definitely use some serious touch ups.

RECIPE AWAY
*You can always not-use any equipment, but it’s just simpler in this recipe to use a mixer and a food processor. In any way, both methods are described.
*make sure you’re not stressed with time because the dough needs to rest in the fridge for at least 30 minutes to get its act together.

Nutella and Pretzel Hamantaschen
Makes about 50 cookies, depends on the diameter of cookie cutter 🙂

From the pantry
For the dough, all in room temp:
3 cups (13.5 oz) AP flour
1 tsp baking powder
1/4 tsp salt
1 cup (4 oz) confectioners sugar
1 stick and 6 TBS (6.5 oz) butter
1 L egg + 1 yolk
1 tsp vanilla extract

For the filling:
1 cup Nutella spread
1/2 pack – about 4-5 oz of any kind of hard pretzels
1/2 tsp cinnamon (optional)
*Piping bag would be nice if you have any.

For show
Some confectioners sugar to sprinkle

Get Mixin’

Make the dough: 

  1. If you have a mixer (lucky you, what luxury to have in a tiny apartment!), start by beating the butter and sugar with the pedal attachment. If you don’t, don’t worry, just use a wooden spoon. Try going slow because the sugar is so light it will fly right out of the bowl (and here goes your measuring. And your recent cleaning efforts).
  2. Add the egg + yolk, and the vanilla. Mix until well combined.
  3. Add the flour and beat until incorporated (if you’re doing it manually and it starts getting harder with the wooden spoon, you can use your hands and knead it a little).
  4. Wrap in plastic and allow to rest in the fridge for at least 30 minutes.

Make the filling:

  1. If you have a small food processor, grind the pretzels to very small pieces. You can leave some larger pieces for texture. If you don’t, take 2 (clean!) nylon bags, double wrap the pretzels and smack the hell out of the bag until the pretzels give up. Good way to let out some of those aggressions.
  2. Put the Nutella and cinnamon in a bowl. Gradually add the pretzels. Don’t get it all in at once – you might end up with really condense texture. Remember the test? Spoon some to a place and see if it spreads just a little. If you have a piping bag – fill it up with the filling. No need for a special tip.
  3. Heat the oven to 350f.
  4. Roll the dough to 1/3″ thickness. Use a round cookie cutter or a regular cup to make rounds out of the dough. I used an 8″ cutter. Collect the dough leftovers to roll again and repeat the process.
  5. Using a spoon or a piping bag, put about 1 tsp of filling on each round. Fold the dough to make a triangle and pinch the ends with your fingers.
  6. Arrange on a sheet tray with about 1’’ space between the cookies.
  7. Bake on the upper rack for about 15-18 minutes until the cookies are golden (my oven took full 18 minutes, but I know other ovens are probably better and require less time).
  8. Share with all of your friends, and don’t forget the cellophane!

IMG_3273