Easy Pasta with Sardines and Parsley for Hot Summer Nights

July in NYC can be brutal; Hot and steamy, with 90% humidity that will make you wish it would rain instead (and it probably would!).
Summer is one of those seasons where all you want to eat is light, fresh meals that will cool you down and help you brave through the high temps.
I’m not a huge meat consumer, so this actually works great for me. The abundance of fresh ingredients Summer brings us is always fun to play with to create flavorful dishes.

IMG_4395

One of my best light dinner go-to choices is pasta with sardines, parsley, chili and breadcrumbs. It has tons of versions, but what’s unique about my version is that you (wait for it–) USE the oil the sardines are marinated in! it’s packed with flavor, and using it will make you feel the sea flavor in each and every bite.

The beauty of this dish is that the most important ingredients are pantry-based, so it’s one of those rare dishes where you don’t have to plan ahead (too much). You just gracefully pull it out of the cabinet and match whatever herbs you have in your fridge (parsley pairs best, but any other herb can work!). This is also great for entertaining because it’s so simple to make, and very pretty to serve along with a nice, cool glass of dry white wine 🙂
The recommended pasta for this recipe is the long kinds, which are usually paired with lighter sauces.

Go for it!

IMG_3760

Easy, flavorful Pasta with Sardines, parsley, chili and breadcrumbs
Serves 4 (or 2 with leftovers for the next day!!)

From the Pantry:
1 package spaghetti pasta, bucatini or linguine
¼ cup extra virgin olive oil
2 cans of sardines in olive oil
4-5 garlic cloves, peeled and smashes with the back of a knife
¼ teaspoon chili flakes (or more if you’re up for it!)
¼ cup panko breadcrumbs or fresh chunky breadcrumbs
Leafs from 1 big bunch of parsley, roughly chopped
Salt and pepper to taste

For Show:
Freshly grated Parmesan

Get Mixin’:

  1. Cook pasta according to package instructions until al-dente (don’t forget to salt the water!). Drain, reserving 3 tablespoons for the cooking liquid.
  2. Meanwhile, in a large skillet, heat the oil. Open the sardine cans, remove sardines to a plate and drain the oil into the pan. Add garlic and cook until it starts to be fragrant, about 2 minutes. Add chili flakes and breadcrumbs, and cook until breadcrumbs begin to brown, about 2 minutes. Add sardines and using a wooden spoon, break them into large chunks.
  3. Add the cooked pasta into the skillet. Stir in parsley and reserved pasta cooking liquid. Season with salt and pepper to taste.
  4. Serve with freshly grated Parmesan cheese.


Suggested variations:

  • Replace parsley with cilantro, sage, tarragon or even mint
  • Use 1 can of anchovies instead of 2 cans of sardines
  • Add ½ cup halved cherry tomatoes for acidity
  • Add ¼ tsp of smashed coriander seeds along with the chili for a more earthy flavor.


THE ONE DISH YOU HAVE TO TRY THIS HOLIDAY DINNER

Every holiday season I have an urge to reinvent my cooking. Did I say reinvent? I meant SIMPLIFY.

The whole Thanksgiving dinner hu-ha is much too much for me. Don’t get me wrong; in the most part, I’m excited for the days and days of grocery shopping and cooking – but sometimes, I feel like having a nice dish that doesn’t require too much effort and that would still taste amazing. Besides, sometimes – hours before dinner, when I’m up to my ears in cooking – I find myself thinking: maybe I over did it, next year I’d rather sit down at the dinner table refreshed and responsive rather than exhausted and worn out from all the fun cooking 🙂

IMG_9421

HOLIDAY HACKS
I’m a big believer in short cuts, as long as they don’t take away flavor. Over the years, I pulled together a few tricks to have up my sleeve whenever I want something that is quick to make and super elegant, enough to fool everyone around the table.

HUFF AND PUFF AND BLOW THIS HOLIDAY AWAY!

One of those dishes that always work is my puff pastry colorful strips.
The basic trick is to cut ready-made puff pastry to strips, and dress it with different vegetables in different colors, creating a festive look along with distinctly different flavors on each strip.

It’s almost like salad on puff pastry!

Look for frozen puff pastry next time you’re grocery shopping and give it a try. It’s also perfect for a fancy weekday dinner, to be served with a simple radish and Parmesan salad.

IMG_9414


50 SHADES OF PUFF

You can go soooo many ways with this.
The basis is the same for all strips: defrost 1 package of puff pastry, have an egg wash ready (1 yolk scrambled with 1 teaspoon of water), and set your oven to 350.
Once you finish arranging the vegetables and sprinkling the cheese, apply a little egg wash all around the sides of the pastry.
Bake for 18-20 minutes or until the pastry is slightly golden on the sides.

IMG_9411

These are my favorite combinations:

Yellow squash and Asiago cheese with thyme
Yellow squash, cut to 1/8’’ rounds
2 tablespoons Asiago cheese, crumbled
2 sprigs thyme

Cherry tomato with fresh goat cheese and rosemary
½ box cherry tomatoes, halved
1 package soft goat cheese (like Chevre), cut to ¼’’ rounds
1 sprig rosemary, chopped

Pears with blue cheese and almonds
1 pear, sliced to ¼’’ rounds,
2 tablespoons blue cheese, crumbled
2 sprigs thyme

This one is a little more complicated, but is worth the effort!
Asparagus, brown butter and balsamic reduction
½ bunch asparagus
¼ cup 1 tablespoons balsamic vinegar
1 teaspoons of sugar
3 tablespoons butter

*to make the brown butter: in a small saucepan over medium heat, put the butter and allow to melt. Take off heat when it becomes slightly golden and smells nutty. Allow to cool slightly before drizzling over asparagus.

*to make the reduction, combine vinegar with sugar in a small saucepan and allow to reduce by half.

Arrange asparagus and drizzle with balsamic reduction and brown butter. Season with sea salt.


IMG_9402


MAKE AN IMPRESSION WITH (so easy) FANCY BANANA BLONDIES

FALL RUSH AND EXCITING NEWS
Oh I’m so late in posting these (promised I will in my previous post) – September was a busy month! Lots of projects for the holidays and another exciting project of my own – a cookbook! It’s a crazy idea that came by me and a super-talented photographer I met at my former workplace, a food-startup which unfortunately shut down. We said we should meet and take some pictures to benefit both our portfolios, and then she suggested we’d go the whole nine yards and make it into a cookbook. So I thought, why not! If anything, it would be a very interesting process..

The featured recipes will be my go-to’s which are very simple but gorgeous looking, and could be done in any kitchen (the most complicated tool used is a mini – food processor). Promise to post some of the recipes that will be included in the project!

TWO WORDS ABOUT COCONUT OIL
I like experimenting with my recipes, because sometimes a small change in an ingredient can make or brake a recipe. I’ve tried for a while to play with “healthier” ingredients – coconut oil instead of butter, brown sugar instead of white and whole wheat flour to replace AP. I have to say that coconut oil does a great job replacing butter in quick breads and cakes, but less so in cookies – it liquifies so quickly that the dough appears to be too liquidy, which makes you want to add flour, just so it’s not soooo sticky – resulting in a denser, harder cookie.  I do have it on my to-experiment list, so I promise I’ll get the perfect dough along with tips to you.

IMG_8529

AND WITHOUT FURTHER A DUE

HEALTHY(IER) BANANA BLONDIES *and a way to make it super fancy
13×9.5” pan size

From the Pantry:
½ cup (3 oz) coconut oil, melted
1 ½ cup brown sugar
2 eggs
3 TBS vanilla extract
4 bananas
¼ tsp salt
½ tsp baking powder
1 cup whole wheat flour
1 cup AP flour
½ cup chocolate chips

Get Mixin’:

  1. Turn on oven to 350f.
  2. Mix coconut oil, sugar, eggs, vanilla and bananas.
  3. In a separate bowl, mix salt, baking powder and flours.
  4. Pour the dry mix into the wet mixture, and mix using a wooden spoon – only until it‘s combined. Add the chocolate chips.
  5. Pad a baking pan with parchment paper, and pour the mixture over it.
  6. Bake for 25-30 minutes or until the top is dry and the center is set. Cool completely before cutting.

**** For a real fancy and decadent dessert:

IMG_8556Make banana pudding and whip up some whipped cream.
Serve the blondies with a generous spoonful of the pudding and a dollop of the whipped cream!


IMG_8545

About Heat, Overripe Bananas and an Ovenless Banana Bar Recipe!

Bananas are a regular resident in our kitchen. It’s my #1 go-to snack, one that is nutritious as well as filling. I love bananas, but only at a certain stage – when they’re just right – when they still have a bite to them and they’re not too soft.
… a stage that lasts maybe 12 hours 🙂
The trouble is, and I’m sure you’re with me on this – in this summer-heat, even when you buy the greenest bananas, they’ll ripen within 2 seconds and MAN do I hate those fruit-flies that comes along when they do!

IMG_9168
                          1…2…overripe!

MIXED BLESSING
So what almost always happens is, I get ‘stuck’ with 2-3 overripe bananas on a bi-weekly basis. Why the apostrophes? Because overripe bananas make a great baking ingredient! They should have a section for these in supermarkets. Seriously, how many times did you crave Banana Bread only to realize there are only green ones, got home disappointed or tried to “artificially ripen” it in the microwave? (Guilty. The outcome was meh.)

GET CREATIVE
Anyway, this week I somehow ended up with no less than 5 (!) overripe bananas, so I had to be super creative. Since I want my husband to enjoy my baking (plus it’s always nice to eat healthy) – I try to come up with vegan recipes that would be as scrumptious as my regular ones. Did you know bananas make great substitutions for eggs, btw? Haven’t tried it yet, though. Promise to publish results as soon as I do 🙂

IMG_8566

THIS WEEKS’ SPECIALS
I wanted something vegan, nutritious – but mostly, one that doesn’t require me to turn the oven on (It’s August..!). So I came up with a vegan Midday-Banana-PB-Snack that pairs perfectly with coffee for those pesky 3PM sleepy-hours when you’re having trouble keeping your head away from the keyboard… 😉
I also tweaked a Blondies recipe to accommodate a fair amount of bananas, but it has eggs in it. I did use coconut oil instead of butter, and switched half the amount of AP flour for whole wheat… if it makes any difference (it does to me!)
I’ll post that one in the next blog though.
So to get your juices going, here’s the Midday Snack recipe!

IMG_8557

IMG_8558

BAKELESS BANANA-PB-CHOCOLATE VEGAN BAR
Yay, no oven needed!

From the Pantry:
2 tbs coconut oil
1 cup rolled oats
3 tbs maple
¼ tsp salt
1 banana, mashed
2 cups rice puffs

For Show:
½ cup peanut butter
2 oz chocolate

Get Mixin’:

  1. in a medium pan over medium heat, melt the coconut oil. Add the rolled oats, maple and salt. Add the banana mash, remove from heat and allow to cool completely. (it’s important that the mixture is completely cool, otherwise when you add the rice puffs they will absorb the moisture and lose their crunch. And what’s a rice puff without its crunch!)
  2. When cool, add the rice puffs and mix well.
  3. Pour mixture into an oiled loaf pan or other medium pan.
  4. Put the peanut butter ina microwave safe bowl and heat for 20 seconds, just to make it more spreadable. Spread over mixture.
  5. Put the chocolate in a microwave safe bowl. Heat the chocolate in 20 seconds integrals until melted. Pour over peanut butter.
  6. Allow to cool in fridge for at least 2 hours. Using a large knife, cut to squares and enjoy a great, vegan, filling snack (and your not-steaming-hot kitchen!)

IMG_8567

SPRING, PICNICS AND PRETZELS

Ahhh. FINALLY some days of sunshine on the streets of NYC. I forgot what it’s like to wear sunglasses. Only 6 weeks ago I was taking pictures of snowy paths in Central Park, and yesterday I was able to wear a short-sleeved T! (Briefly though, as it was still chilly, but hey, I’m not complaining)…
I always find it amusing to see the mood change in people. Everyone’s so cheerful and happy; you can actually see it as they walk by. And of course, it’s a perfect weather for a walk in the park – and a picnic. With Central Park’s recently opened lawns, it’s a great hangout for meeting friends, plus it’s a nice change than those stuffy dark bars… 🙂

MARKETING NATURE
Do parks need marketing? I would argue that they do. With spring out, many people are looking for outdoor activities, and there are so many of those in NYC! Every second neighborhood has its flea/food/music festival, and the park is just another option out of many. The NYC Park Department has tons of fun events – free movie screenings, concerts and shows, and of course Shakespeare in the Park – but these are yet to come and are mainly during summer, which makes sense because spring just started so the weather is still volatile and the trees are still leafless. But! Apparently there’s still events going on – although it would probably be more appealing to you if you have to entertain a few kids around the house…

That said, I think that my favorite park activity – picnicking – doesn’t need any marketing 😉 It’s so tempting on its own! And of course, my picnics always have a homemade touch to it, so it adds a little extra fun to the experience. I usually buy some really good bread and make yummy spreads to go along with it – pesto, almond paste and olive spread, but this time I felt like going the whole nine yards and make my favorite kind of baked good: New York style soft pretzels.

DID SOMEONE SAY PRETZEL?
Guilty! I love anything doughy. I don’t know what I would do I was gluten intolerant! Pretzels are pretty simple to make, and it tastes divine, but many people find it fussy and therefore don’t attempt it at home. If you’ve ever dealt with yeast before, this should be pretty easy. And if you haven’t, a word of ‘wisdom’: yeasty dough is a friend, and a pretty yummy one too! You won’t screw it up that easily. 😉
The only difference in the process with compare to a regular yeast process, is that you need to poach the pretzels in water before you bake it; this will give it its signature shine and beautiful golden color as it bakes. And if you ever poached an egg – this shouldn’t be too hard!
Special ingredient alert: in order to get the full NYC Pretzel effect you’ll need pretzel salt (yes, the salt is actually called after this baked good!), which you can find on amazon or in specialty stores. And if you have high gluten flour, it would yield an even more chewy pretzel thanks to the high gluten content.

IMG_1852

ADDICTIVE NEW YORK STYLE SOFT PRETZELS

 From the Pantry:
¼ oz (one envelope) dry yeast
1 pint warm water* (see comment)
2 oz / ½ stick butter, cold
1.5 pounds (3 1/3 cups) AP flour (high gluten flour is preferred if you have it)
½ oz (~2.5 teaspoons) salt
Optional: 1 tablespoon Tabasco

*Warm water: the rule is, if it feels nice n’ warm to you, it would be nice n’ warm for the yeast. Do not use boiling water and not even close! It would kill the yeast and would ruin your mood when the dough will not rise…

 For Show:
Pretzel Salt

 Get Mixin’:

  1. Combine yeast and warm water; stir to dissolve.
  2. Cut butter into flour until fully incorporated; this could be done with a food processor, which would make it easier but would result with more dishes to wash 😉
  3. If doing this manually, combine flour mixture, yeast mixture and all other ingredients in a bowl, mix and knead to form a smooth dough. If using a stand mixer, do the same – only the mixer would be doing the kneading for you.
  4. Cover bowl with plastic wrap and allow to rest for 15-20 minutes.
  5. Divide the dough into ~5 oz pieces the size of a small tennis ball), and roll into 24’’ long cylinders.
  6. Form into a pretzel shape: make a “U”, cross the ends and flip the cross over the lower curvy side of the U. Look at this cool shaping guide I found online:
Pic credit: Breadmachinedigest.com
  1. Cover pretzels and proof in a warm place for about 15-20 minutes.
  2. Heat oven to 400fF.
  3. In a wide pot, boil water and reduce to a simmer. Poach pretzels in water 30-40 seconds and remove to a cooling rack to discard excess water. Strew with pretzel salt.
  4. Prepare 1-2 sheet trays with parchment paper, and spray lightly with oil.
  5. Arrange pretzels on trays, and bake 15-20 minutes, or until deep golden.
  6. Cool on rack.
  7. Try not to eat it all before you get to your picnic!

IMG_1870

HUMMUS FOR THE MASSES

Vegans seem to be everywhere these days. I can definitely say that by now, it’s a trend, not just a fend that will soon be gone.
There’s vegan restaurants popping up on every street corner, and serious eateries now offer a vegan option. I never gave it too much thought, until a couple of years ago my husband decided he’s going to give it a try. It was pretty funny – just the previous day he asked me to buy him some pastrami. Yup, he went all cold-turkey on this one, leaving the pastrami to rot in the fridge… And he’s been vegan ever since.

LEGO-WHAT?
This decision of his made it pretty challenging for me. I mean, it immediately crossed-off a whole section of restaurants (like steakhouses), not to mention the challenge at home. I now had to face a different segment of ingredients. Not that I haven’t known or used them before, but the daily requirement for veggie-based protein completely threw me off. And I learned a new word: LEGUMES. The lentil-chickpea-bean extended family. The mere pronunciation of the word sounds un-appetizing… but these little beads are highly nutritious, low in cholesterol and with the right combination, give you a very balanced meal.

CULINARY MARKETING
A few years ago I came across a facebook group called “vegans who depress me”. Members used to collect other users’ food pictures/outside links to pictures that looked, well, not so photogenic, to say the least, accompanied by “oh look how amazing these vegan brownies turned out!” and post it in the group. It wasn’t pretty and yes, pretty depressing. I’m pretty sure it’s gone by now, but it did not do good for Vegans.
Generally speaking, Vegans still have a weird rep. All that tofu, meat-make-believe, cheese-replacements.. I mean, just google it and see what you find. The top 3 links get you to really boring, fact-full sites that makes you want to regret you even tried.
I feel like the current reputation does Vegans injustice. Vegans can eat lots of “normal” stuff. In fact, most cuisines have many vegan-friendly options: Italian (Penne with mushroom ragu’), Indian, Mediterranean, Mexican (think meatless taco), Japanese (veggie sushi)…
I think good PR would come if they just stay away from all those alarming substitutes and just celebrate their own cuisine. Because if you still want to imitate your favorite cheeseburger, what did you accomplish by being vegan?…
Thank god for vegan recipe sites like Serious Eats’ and Jamie Oliver’s vegan section, and lots of bloggers around the web suach as this (contains vegan and vegetarian recipes) and this. Anyway, there’s still a lot to do to repair the movement’s current image.

THE HUMMUS WHISPERER
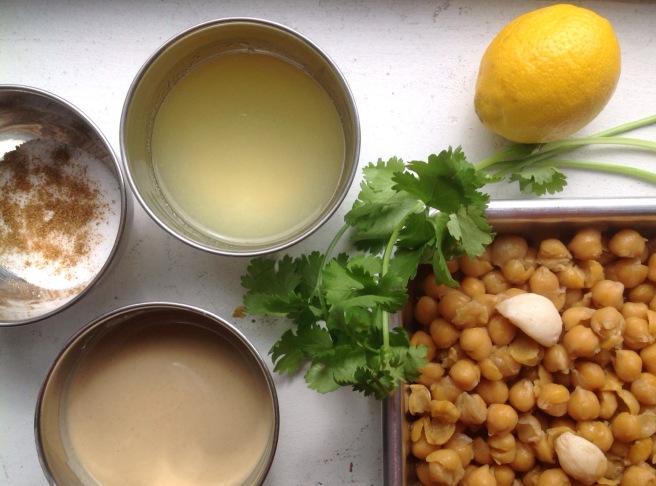
One of our most favorite Vegan foods is Hummus, which is basically mashed chickpeas with tahini and some spices. Pretty basic, but oh-so-yummy. It’s not easy to find good hummus in NYC; Hummus Kitchen is a decent option, but it’s not always convenient to go there, plus it’s so much more fun (and tasty!) to make at home, plus it yields a nice amount so you can eat it for several days. So I took it as a project and am happy to say that my hubby swears by my hummus now 🙂

DON’T PANIC
Many people find it intimidating to make hummus at home. I’m guessing the main reason is because it’s a time consuming process and you don’t really want to mess it up because re-do’s are hard in this case. I’m not saying these people are completely mistaken; there’s always something that can go wrong. I think the main setback is knowing when the chickpeas are tender enough and are ready. But if you follow the recipe, you’ll end up with a good result, from which you could make your own adjustments.

IMG_3309

HUMMUS!
Yields ~6-8 portions, depends on your hummus intake 😉
This recipe requires a food processor.

From the Pantry:
2 cups dry chickpeas
1 yellow onion, peeled and cut to quarters
3 pcs garlic
1 tablespoon coriander seeds
1 teaspoon cumin seeds
1 tsp baking soda
—-
½ cup tahini paste
Juice of 1 lemon
¼ tsp ground cumin
1 tsp salt

For Show:
Pinch of paprika
Olive oil to taste
1-2 sprigs straight-leaf Parsley
1 Small yellow onion, peeled and quartered
Pita bread (I found Naan bread a nice substitute)

 Get Mixin’:

  1. Put chickpeas in a large bowl, cover in double amount of water and allow to soak for 8-12 hours. (Can be soaked up to 24 hours, just replace the water once)
  2. Drain and rinse chickpeas. In a large pot, combine chickpeas, onions and garlic. Cover in water and bring to a boil. Reduce to a simmer. Add baking soda.
  3. While the pot is on, put the whole cumin and coriander seeds in either cheesecloth or a tea ball infuser (kinda like a miniature closed strainer), so they won’t be loose in the pot – you just want the flavor of the spice in the water and this is an easy way to take it out at the end. (This is a similar technique to the classic french “sachet d’epices”). Add to the pot.
  4. Cook until chickpeas are really soft – aka can be easily mashed between your fingers (try it carefully..!), around 1.5-2 hours. Pay attention: this could take either longer or shorter, as it depends on the amount of time it was soaked and how fresh the chickpeas were.
  5. Almost there! Drain the chickpeas, but leave 1 cup of the cooking liquid just in case it’s too dense. Discard the spices. Allow to cool for several minutes.
  6. Combine cooked chickpeas, tahini, lemon, ground cumin and salt in the bowl of a food processor. Pulse until the mixture unifies in a nice looking paste.
  7. Take a spoonful and taste. You can adjust consistency by adding some of the cooking water, and adjust flavor by adding any of the flavor agents: lemon, salt, cumin, and tahini.
  8. Plate in bowls, using around 4-5 tablespoons per dish. Garnish with a drizzle of olive oil, a dash of paprika and some parsley.
  9. Serve with pita bread and a plate of onion, parsley and pickled cucumber.
  10. Ready for your nap? 🙂

IMG_3311

Nutella, Pretzels and Shortbread. This is gonna be good

So this week was the Jewish holiday Purim. It’s the equivalent of Christian Halloween Costume wise. Unlike Halloween – there’s no trick-or-treating, but we have something else: it’s a mitzvah to drink until you drop. Yes, you’re reading correctly. Gotta love this holiday.

HOLIDAY TRADITIONS
Another thing about this holiday is that it’s customary to give your friends and family a goody-bag filled with candy and the traditional cookie – Hamantaschen, which literally translates as ‘Haman’s ears’ (did you really think we’d let a holiday go by without something to nosh on?). It’s also customary in a large crowd to have a raffle deciding who this goody bag will go to. I can still remember a school table packed with bright yellow, green and red cellophane-wrapped parcels, each with our name on it (noting who made it), and the raffle that followed. My best friend’s mom used to make the best bags, but somehow I was never the one to receive it.

BACK TO THE COOKIES
These are a kind of shortbread cookies filled with all kinds of yummy filings; the traditional version calls for a poppy seed filling, but you can fill it with whatever you want – chocolate, halva, peanut butter, etc. you can go savory too, of course, but this is a whole other discussion… So we’ll stick to the sweet part, if it’s ok with you.
The only thing you should look out for is making sure that it’s thick enough so it wouldn’t leak out of the sides of the cookie which can cause it to open and ruin the whole nicely-shaped-triangle you were working so hard on. The rule is: if you spoon a little on a plate and it keeps its shape – spreading just a little, you’re fine. If it flattens up – not so much. So how do you fix it? All you need is something to absorb the extra liquid.

PRETZEL TALK
Say you want Nutella filling (I know I do). Very runny. But you still want it. What you can do is add a thickening agent – which in this case is much easier than making roux, dissolving cornstarch etc.: to get the desired consistency, an addition of crumbled cookies, day-old pound cake crumbles and so on would work perfectly. In my filling – being a sweet-and-salty gal myself – I decided I want to try adding crumbled pretzel sticks.

IMG_3268

BRAND DROPPING
Wow, Snyder’s of Hanover. Great job well done on your recipe tab. I didn’t quite expect it, given that the snacks category tends to sometime overlook the foodie recipe-searching community, but you did great with all the different options. The site goes from your usual suspects of pretzel bread-crumb alternatives through finger food to main course and dessert with lots of navigation options, and offers many recipes that actually include the product itself. Lots of topping-things involved, but many variations, so I’ll give them that. I also looked at Rold Gold’s website – another FritoLay brand (remember them from last time?). I guess being part of a larger group of brands can sometimes mean being in the background. There were only 5 recipes dedicated to the brand, 3 of which did not involve the use of the product itself. Maybe FritoLay considers the brand a ‘Milking Cow’ and does not want to invest too much into it. Whatever the reason, it could definitely use some serious touch ups.

RECIPE AWAY
*You can always not-use any equipment, but it’s just simpler in this recipe to use a mixer and a food processor. In any way, both methods are described.
*make sure you’re not stressed with time because the dough needs to rest in the fridge for at least 30 minutes to get its act together.

Nutella and Pretzel Hamantaschen
Makes about 50 cookies, depends on the diameter of cookie cutter 🙂

From the pantry
For the dough, all in room temp:
3 cups (13.5 oz) AP flour
1 tsp baking powder
1/4 tsp salt
1 cup (4 oz) confectioners sugar
1 stick and 6 TBS (6.5 oz) butter
1 L egg + 1 yolk
1 tsp vanilla extract

For the filling:
1 cup Nutella spread
1/2 pack – about 4-5 oz of any kind of hard pretzels
1/2 tsp cinnamon (optional)
*Piping bag would be nice if you have any.

For show
Some confectioners sugar to sprinkle

Get Mixin’

Make the dough: 

  1. If you have a mixer (lucky you, what luxury to have in a tiny apartment!), start by beating the butter and sugar with the pedal attachment. If you don’t, don’t worry, just use a wooden spoon. Try going slow because the sugar is so light it will fly right out of the bowl (and here goes your measuring. And your recent cleaning efforts).
  2. Add the egg + yolk, and the vanilla. Mix until well combined.
  3. Add the flour and beat until incorporated (if you’re doing it manually and it starts getting harder with the wooden spoon, you can use your hands and knead it a little).
  4. Wrap in plastic and allow to rest in the fridge for at least 30 minutes.

Make the filling:

  1. If you have a small food processor, grind the pretzels to very small pieces. You can leave some larger pieces for texture. If you don’t, take 2 (clean!) nylon bags, double wrap the pretzels and smack the hell out of the bag until the pretzels give up. Good way to let out some of those aggressions.
  2. Put the Nutella and cinnamon in a bowl. Gradually add the pretzels. Don’t get it all in at once – you might end up with really condense texture. Remember the test? Spoon some to a place and see if it spreads just a little. If you have a piping bag – fill it up with the filling. No need for a special tip.
  3. Heat the oven to 350f.
  4. Roll the dough to 1/3″ thickness. Use a round cookie cutter or a regular cup to make rounds out of the dough. I used an 8″ cutter. Collect the dough leftovers to roll again and repeat the process.
  5. Using a spoon or a piping bag, put about 1 tsp of filling on each round. Fold the dough to make a triangle and pinch the ends with your fingers.
  6. Arrange on a sheet tray with about 1’’ space between the cookies.
  7. Bake on the upper rack for about 15-18 minutes until the cookies are golden (my oven took full 18 minutes, but I know other ovens are probably better and require less time).
  8. Share with all of your friends, and don’t forget the cellophane!

IMG_3273

Everybody Loves a Short Cut

I love inviting people over for dinner. I deliberately say “I”, because my dear husband doesn’t share this passion with me – at least not in our current shoebox we like to call home. Like many other NYC diggs, we don’t really have much room to play with: the table only seats 4, and if we want a more casual option around the coffee table, it can probably entertain 6 people altogether. Tops. And this is before you calculate all the room that the unused pots and pans would take up (they usually reside in the oven, but when the oven’s on, they’re in all sorts of places – on the window, the table, on the book shelves… I get very creative with it 😉 ). Our kitchen is tiny as well and so I can’t prep and cook at the same time, nor can the stove accommodate more than 2 pots together (and there’s absolutely nowhere to put cold dishes. My fridge is packed).
So for all of there reasons, Mr. Hubby gets a migraine just thinking about this Rubik’s Cube logistics, the before, the during and the after… But I don’t mind. If it were up to me, we’d have friends over day in and day out…

Trick and treat
So in order to come to terms with my hubby and still be able to spoil my friends, I usually try to take short cuts in the meal components to create a beautiful but not-so-hard-to-make meal, and convince Mr. Hubby that ‘honestly, it wouldn’t take me more than 4 hours, including everything!’. Not very convincing, I know, I know… But usually he’s kind enough to put up with my pleadings and just doubles up the Advil dose.

Short cuts
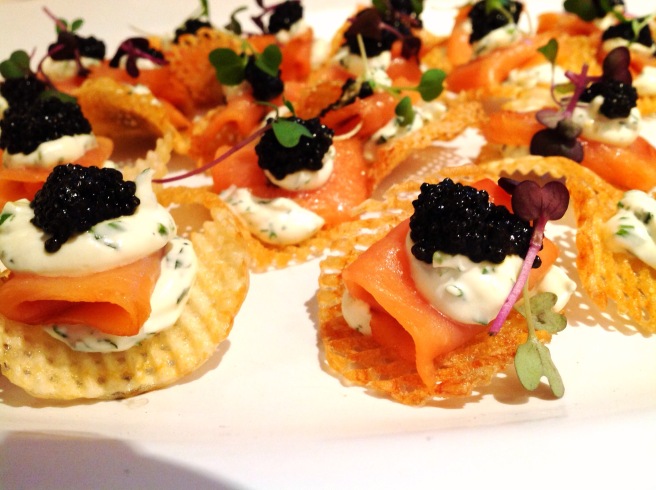
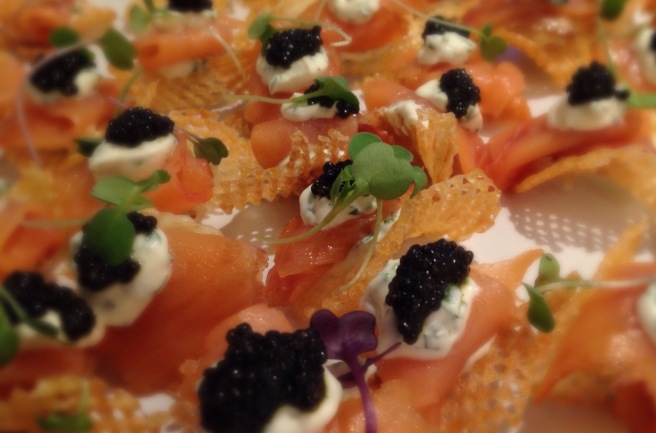
Short cuts can be taken in every part of the meal, by creating dishes that combine both store-bought and homemade ingredients. You can apply this on every part of the meal – hors d’oeuvres, starters, main and dessert. The simplest example would be a homemade pie accompanied by store-bought ice cream. The coming recipe is the ultimate finger-food – yummy, not too messy, aesthetic – and pretty darn easy to make. This is guaranteed to take you less than 20 minutes to assemble (and less than 5 to enjoy before it’s gone -10 if you have super-polite guests ;)) One of my favorite things to make is a fancy alternative to bruschettas or blinis: Crinkle-cut potatoes (aka the wavy kind) with sour cream, smoked salmon and caviar. I’m getting hungry just imagining it… in utopia, I would make the potatoes myself as homemade fries by using a mandolin that would create that effect – but due to all of the above, I settle for store bought chips.

IMG_2644

Culinary Marketing
Because I rarely purchase any kind of old-school snacks, I rarely get to the chips shelves. There’s many ways to utilize chips, and snacks generally, in all kinds of food preparations. It can replace breadcrumbs when you’re making chicken Supremes, the crunch factor in salads, the salty-crunchy bite in chocolate truffles filings and whatnot. But rarely do I see any attempts to approach foodies with these suggestions.

Brand dropping
I checked a very posh brand’s website – Kettle brand, which has its Krinkle Cut chips (very tasty, BTW). No recipe section there. Come on, guys! This product is aligned very well with recent health trends (no trans fat, all natural ingredients, no preservatives etc.), so it’s already half way there. Mix it with the home cooking trend, and you’ll find that your demand will rise, because people will not only be using the products as snacks – but as relevant cooking ingredients. Searching other sites for inspiration, I visited Ruffles’s website (a FritoLay brand’s). Success! There’s a recipe section. Like many other houses-of-brands, FritoLay supplies the Ruffles recipes as part of a bigger picture, which offers many other recipe options for all of the brands, mixed together (you can find Cracker Jack, Dorito’s and more). But to my surprise, almost 75% of the recipes did not involve the use of the product itself, but recipes that would compliment it (such as dips of sorts), or that are inspired by it (dry BBQ rub, inspired by the BBQ Ruffles product). I think there are many more opportunities to explore here, and it could use some more creative recipes utilizing the products themselves. Point for thought.

Strike-A-Pose Crinkle Chips
Serves a crowd

From the Pantry:
1 bag Crinkle Chips, regular (unflavored)
1 cup sour cream or Crème Fraiche
2 teaspoonds wasabi powder
1 tablespoon warm water
¼ cup minced chives
pinch of salt

10 pieces smoked salmon, cut to smaller 1’’ by 3’’ pieces
few drops lemon juice
zest of ½ lemon  

For show:
Red/black caviar (depends on how fancy you’re looking to be)
Arugula Micro greens / some more chives  

Get Mixin’:

  1. For the cream: mix the wasabi and warm water to create a paste. Fold into the cream. Add chives and salt.
  2. For the salmon: mix the fish with the lemon and zest.
  3. Assemble! Arrange the chips so that they would stand nicely (and wouldn’t flip over when you mount it with all that yumminess)
  4. Put ½ teaspoon of the wasabi cream on the chip, add a folded piece of the salmon, then another ½ teaspoon of the cream. Top with a dollop of caviar and some micro greens.
  5. Wait for your guests. It’s for them, after all… or is it?

IMG_3246