Easy Pasta with Sardines and Parsley for Hot Summer Nights

July in NYC can be brutal; Hot and steamy, with 90% humidity that will make you wish it would rain instead (and it probably would!).
Summer is one of those seasons where all you want to eat is light, fresh meals that will cool you down and help you brave through the high temps.
I’m not a huge meat consumer, so this actually works great for me. The abundance of fresh ingredients Summer brings us is always fun to play with to create flavorful dishes.

IMG_4395

One of my best light dinner go-to choices is pasta with sardines, parsley, chili and breadcrumbs. It has tons of versions, but what’s unique about my version is that you (wait for it–) USE the oil the sardines are marinated in! it’s packed with flavor, and using it will make you feel the sea flavor in each and every bite.

The beauty of this dish is that the most important ingredients are pantry-based, so it’s one of those rare dishes where you don’t have to plan ahead (too much). You just gracefully pull it out of the cabinet and match whatever herbs you have in your fridge (parsley pairs best, but any other herb can work!). This is also great for entertaining because it’s so simple to make, and very pretty to serve along with a nice, cool glass of dry white wine 🙂
The recommended pasta for this recipe is the long kinds, which are usually paired with lighter sauces.

Go for it!

IMG_3760

Easy, flavorful Pasta with Sardines, parsley, chili and breadcrumbs
Serves 4 (or 2 with leftovers for the next day!!)

From the Pantry:
1 package spaghetti pasta, bucatini or linguine
¼ cup extra virgin olive oil
2 cans of sardines in olive oil
4-5 garlic cloves, peeled and smashes with the back of a knife
¼ teaspoon chili flakes (or more if you’re up for it!)
¼ cup panko breadcrumbs or fresh chunky breadcrumbs
Leafs from 1 big bunch of parsley, roughly chopped
Salt and pepper to taste

For Show:
Freshly grated Parmesan

Get Mixin’:

  1. Cook pasta according to package instructions until al-dente (don’t forget to salt the water!). Drain, reserving 3 tablespoons for the cooking liquid.
  2. Meanwhile, in a large skillet, heat the oil. Open the sardine cans, remove sardines to a plate and drain the oil into the pan. Add garlic and cook until it starts to be fragrant, about 2 minutes. Add chili flakes and breadcrumbs, and cook until breadcrumbs begin to brown, about 2 minutes. Add sardines and using a wooden spoon, break them into large chunks.
  3. Add the cooked pasta into the skillet. Stir in parsley and reserved pasta cooking liquid. Season with salt and pepper to taste.
  4. Serve with freshly grated Parmesan cheese.


Suggested variations:

  • Replace parsley with cilantro, sage, tarragon or even mint
  • Use 1 can of anchovies instead of 2 cans of sardines
  • Add ½ cup halved cherry tomatoes for acidity
  • Add ¼ tsp of smashed coriander seeds along with the chili for a more earthy flavor.


1-INGREDIENT ELEGANT RECIPE HACK!  


Green and red and holiday cheer – there’s no doubt Christmas is my favorite time of the year here at NYC. The decorated storefronts, the tree-lighting events, the ice skating – and the shower of emails offering their version of a holiday recipe.

The Holidays are every foodie’s dream – so many meals to plan for, and so many options to pick from! I’m usually saving tons of recipes along the year and putting it under a “must try” file. This is such a fun process, but sometimes you find yourself with too many recipes and not enough opportunities to make them all. Happens to me all the time!

THE HACK WITH THAT
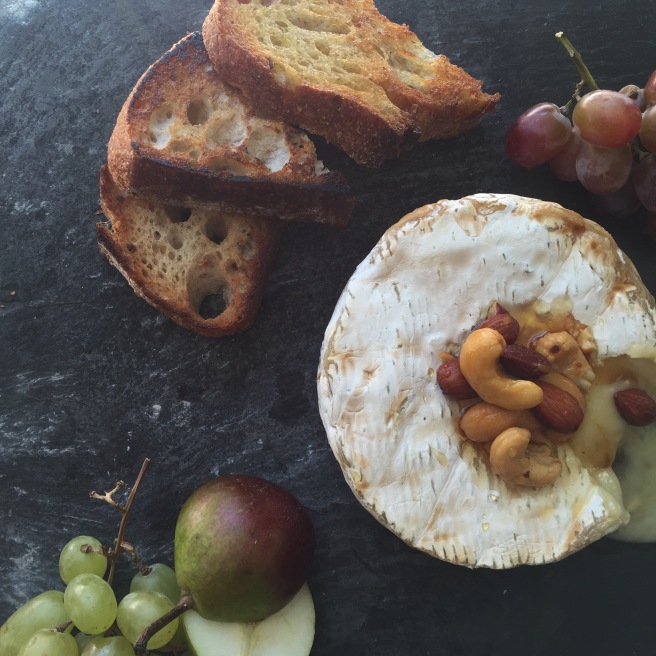
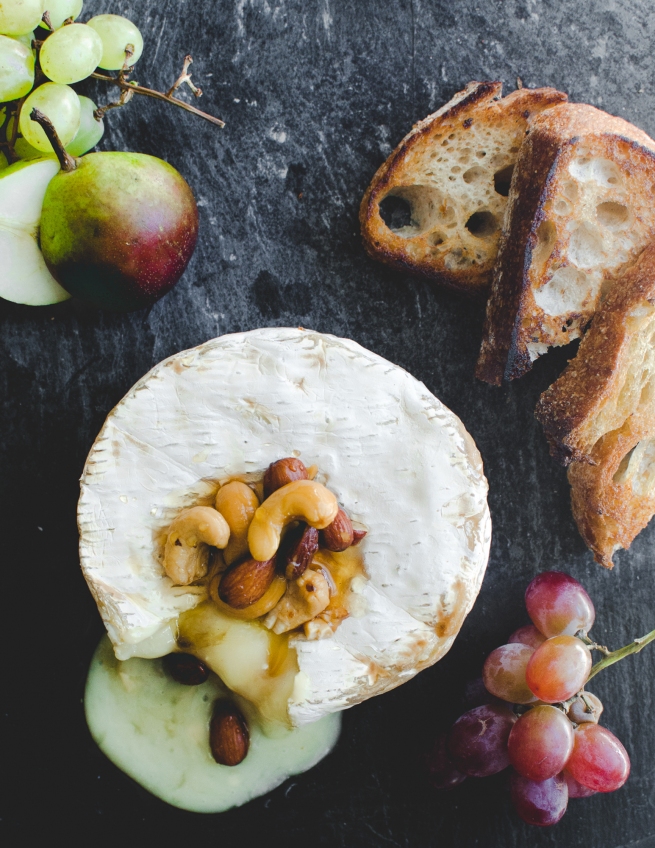
So continuing my last post about short cuts and hacks, I’d like to give you a recipe that requires only one ingredient (ONE!), and can be very versatile (just the way I like them…) – Baked Brie. It can be served alongside crackers and fruits as an afternoon snack, as a side dish for a light dinner or brunch. The additions can be anything you like, and will determine the character of the dish.

READER’S CHOICE
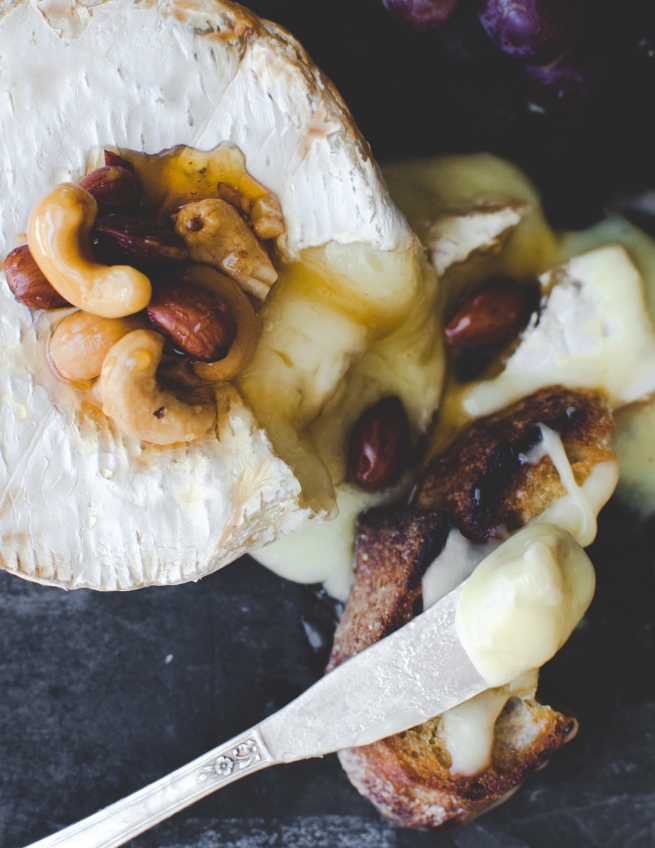
So here’s how you make it your own. When baked, the cheese gets super gooey on the inside but the exterior will keep its shape and structure. It all depends on how you like it, so there’s actually no specific baking time. The rule is, the longer you bake it, the gooier it will get (not to mention runny!). It can range between 5-20 minutes in a pre-heated oven, depending on the size of the cheese.

INSIGHTS
Use the kind of cheese you would usually enjoy at room temp. There are two rules to remember: first, because this is a sole ingredient recipe, it is all about quality. Second, cheese gets naturally runny the more ripe it is. When it’s only the two of us, I like to use Trader Joe’s goat milk cheese, which is just right. If it’s served as a snack alongside wine and some fruit it can serve up to 4 people. For a party of more than 4 peeps, I’d get a larger chunk of about 8oz.

This is so good.

IMG_9324

FREESTYLE BAKED BRIE
Serves 4. For a larger crowd, use a larger cheese wheel!


FROM THE PANTRY:
1 4.4oz Trader Joe’s Goat Milk Brie


FOR SHOW:
Sliced fruit of choice (pears, apples, figs or grapes will be a nice match!)
Baguette slices
Anything that can be dipped!
Optional:    Roasted nuts such as cashew, almonds etc
1 tsp honey

GET MIXIN’:

  1. Preheat oven to 350f.
  2. Take cheese out of original wrap and put on a parchment-lined baking tray.
  3. Bake for 6-10* minutes: 6 for a not-very-runny interior and 15 for a complete meltdown!
  4. Take tray out of the oven and allow to cool slightly, about 3 minutes.
  5. Remove cheese from tray and onto a serving plate.
  6. Optional: Top with nuts and a drizzle of honey.
  7. Using a knife, cut the cheese-wheel. Note that the runny interior will flow out of the cheese, so choose a plate that can handle it! (hint – a cutting board would be an unfortunate choice, Ask my rug.)
  8. Serve and enjoy all the free time for a more complicated holiday project 🙂

* Note: for bigger cheese wheels – add 1 extra minute for every additional oz (so if you get an 8oz cheese, for instance, you’d bake 10 minutes and up to 15 minutes. Yes, I’m rounding it up guys. The original recipe calls for 4.4oz cheese but no one would measure 0.4 minutes..!).

Be Ritual- Emily Schultz
recipe shots
Be Ritual- Emily Schultz
Um nom nom

‘Tis the season …For tomatoes (and 3 super easy recipes to use it in!)

This is it, summer is with us. And with it, my most favorite vegetable of all: TOMATOES!

THE ROSY CHEEKS MYTH
I actually have a very strong memory of me having a tomato when I was little, about 3 years old; I hated it. It was bland. And too soft. My grandmother was feeding it to me, and I refused. Then she said, “If you’ll eat tomatoes, you’ll always have rosy cheeks!”… I’m not too sure about that fun fact, but I know that somewhere along the way I re-discovered it and got totally obsessed with it. It actually came to a point where my husband asked me (as a joke, of course): “Do you love me more than cherry tomatoes?” …

SEASONAL?
The tomato is way past the phase of being seasonal. It’s available in every season, every supermarket, almost everywhere in the western world.
But when it is in season, it is sweeter and more flavorful, and you can come by many different kinds of it in your local farmer’s market: plum, heirloom, on-the-vine, zebra – even black tomatoes. Of course they all have lovely creative brand names but not even I know it all.

Bottom line is, you can enjoy tomatoes even more when in season.

Here are 3 impressive, super-easy summery recipes to help you enjoy it in many different ways!


  1. BMT Bruschetta (basil, mozzarella, tomato)IMG_3369

I love this dish. The creaminess of the cheese along with the tanginess of the tomato and the sweetness of the balsamic reduction. Always my go-to, easy way out when having people over for a light dinner or drinks.
As this is a kind of tapas/finger food, Portions here are for about 4 people to enjoy. You can definitely increase to as many people you’re having.

From the Pantry:
1/3 cup balsamic vinegar
2 tsp sugar
½ 9-grain baguette (or any kind of bread you like!)
2 small tomatoes (if you get colorful or zebra ones, they would show pretty nicely!)
1 ball fresh mozzarella (or 4 small ones)
½ garlic clove, minced
5 basil leafs, chiffonade
2 tablespoons olive oil
salt, pepper

Get Mixin’:

  1. make a balsamic reduction: in a small saucepan, combine balsamic vinegar with sugar. Bring to a boil and reduce to a simmer, cook for 3-4 minutes until the mix thickens. Note that with larger amounts, cooking time will be longer.
  2. Roughly chop mozzarella and tomato. Combine with olive oil, garlic and basil. Season with salt and pepper.
  3. Slice bread into 1’’ pieces.
  4. Assemble: mount each bread slice with the tomato-mozzarella mixture, and drizzle with the balsamic reduction.


  1. Roasted TomatoesIMG_3367
    This recipe works with any kind of tomato – cherry, heirloom, regular store-bought… It really brings out the sweetness of the tomato. You can use the final product in many ways: slice and use on a bruschetta; add to any cold-cut tray or antipasto dish; mince, add basil and olive oil and use as a dip for calzones or any other savory baked good; put in food processor with olive oil and salt and make a beautiful gazpacho. The sky is the limit!

 From the Pantry:
5 tomatoes, halved
5 garlic cloves, smashed
3-4 sprigs thyme
3-4 tablespoons olive oil
salt and pepper

Get Mixin’:

  1. Heat oven to 350f (180C).
  2. Halve tomatoes, season with s+p.
  3. Arrange tomatoes on a baking sheet. Place thyme and garlic in between tomatoes.
  4. Drizzle with olive oil.
  5. Bake until nicely roasted, about 45 min to 1 hour.


  1. Stuffed Tomatoes (vegan)IMG_3368
    Summer is when I never feel like meat. Too heavy. But what do you do for protein? Ha, easy: beans are a great source. Ask any vegan. This recipe has many layers of flavors and is pretty easy to make. Perfect for a light dinner!
    Portions serves 2. You can double, triple, quadruple this recipe and keep the basic ratio. It fills the house with a great sweet smell and is really satisfying.

From the Pantry:
4 large tomatoes
1 garlic clove
½ can white beans, drained and rinsed
1 tsp herb de provence dry herb mix *(see below if you don’t have any)
2 tsp olive oil, plus more for drizzling
4 tsp panko crumbs (whole wheat or regular)

Get Mixin’:

  1. Heat oven to 375f (190C).
  2. Turn the tomato sidewise and cut a small slice off its bottom (to help it stand up while baking). Core tomatoes and spoon out the flesh. Season with salt and pepper. Drizzle w/ olive oil.
  3. Roughly chop tomato flesh, garlic, and beans (You can also do this using a food processor, but make sure you gently pulse it and not turn it into paste!) Transfer to a bowl. Add herbs de provence, olive oil, and season with salt and pepper.
  4. In a skillet, heat 1 tsp of olive oil. Add the tomato-flesh mix and sauté for 3-4 minutes, until fragrant.
  5. Put the tomatoes in a baking pan, facing up. Fill tomatoes with mixture, top with panko and drizzle with olive oil. Use whatever mixture left to cover pan’s bottom. It would caramelize beautifully.
  6. Bake for 20-25 minutes.
  7. Serve with any side dish of your liking (in the picture, with polenta and green salad)

*Herb de Provence herb mix is a 1:1 ratio of dried marjoram, oregano, thyme and rosemary. If you don’t have the herb mix, you can swipe it for all or just 1-2 of the above. But don’t give it up altogether; it’s a very important ingredient that gives a lot of character to the dish!

Variations: for a meaty version, use ground beef instead of beans: in a skillet, heat up 1 tsp of olive oil. Add 4 oz ground beef. Sear until cooked. Add tomato flesh and garlic, sauté for 2 more minutes. Add herb de provence, salt and pepper. Continue as described above.


Happy Tomatoing!

IMG_3366

Market Memories (and Passover Macaroon Cookies)

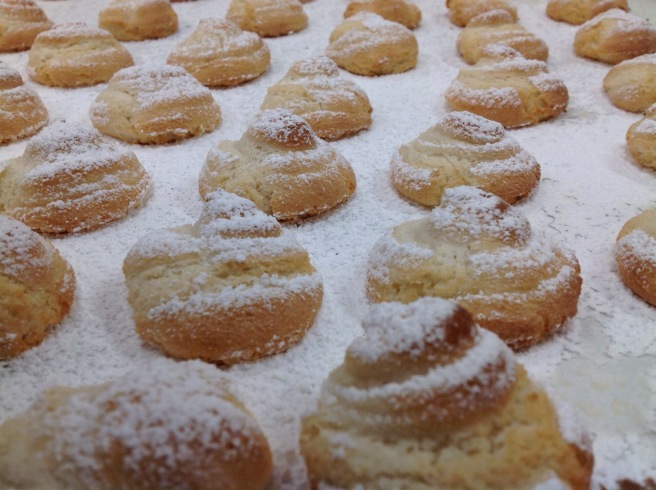
I’ve loved markets for as long as I can remember. There’s something very unique in the experience of walking between the packed stands and the calling merchants, smelling fresh herbs and dried spices, eyeing odd looking vegetables and trying new kinds of food you’ve never heard of. One of the first things I do when I explore a new traveling destination is checking to see where I could find an authentic farmer’s market. I experience life through food, so my most vivid recollections have something to do with food, especially those of my traveling in remote villages around the world: French freshly squeezed apple cider and local brioche loaves; Croatian peasant stew; an Irish sheep cheese my sister couldn’t get enough of so we actually drove back to get more, she was crying so hard; Guatemalan oh-so-soft yellow cakes; Chinese steamed bread; Bolivian colorful orn and the list goes on and on. BALKAN BEAT  But nothing beats childhood memories. My mother is of Turkish descent; so we always have a Balkan feel in family meals. In Tel Aviv, there’s a market called the Lewinsky Market. It lies in a neighborhood that used to be populated by many Balkan immigrants in the early 30’s. My mother still remembers when she was a child in the 60’s, how busy the streets were – filled with merchants selling everything from olives to lemonade, Turkish Burkes to different spices. TRAVEL ALERT  Today the market is alive and kicking, beautiful and colorful, but had changed its character from ingredient-driven to culinary-driven. The neighborhood lost most of its earlier residents, so the demand for the local ingredients has decreased and so did the specialty stores, leaving only a few open. But the market is far from gone; today, in its more up-to-date version, you can find many ethnic eateris from different Jewish cultures around the world like Persian, Greek and Turkish foods. You can still find some of the city’s best Burekas there. TWO WORDS ABOUT PASSOVER I don’t like dried coconut chips. At all. And most Passover sweets I know contains it, one way or the other. I’ve always tried to come up with recipes that would make a detour around it so I could also have a bite. No gluten doesn’t mean you have to stop making baked goods, right? So here’s how I came across a divine coconut-free, gluten-and-dairy-free cookie that I still love making any day of the year.. IMG_3304 THE LOST WORLD Back to the market. A couple of years ago, on my mom’s birthday, we all went for a walk down memory lane around the old Lewinsky neighborhood, where my mother showed us where her grandmother used to live, the path she took to the now-long-gone grocery store and the playground. Wandering around, we got to a store we didn’t know before but my mother was excited to find again: an old bakery, with no signs on the outside, no name, just an “open” sign on the old milky-glass door and some antique-looking scales in the store front – it really looked like it wasn’t touched for a few decades. We followed her in. Inside we found an elderly couple, the woman hustling around the sheet trays and the man sitting down, with a huge pile of almonds next to him, and two bowls – one filled with water and silvered almonds and one with almond skins. It had a back-in-the-day kind of feel. Many shelves, but most of it half empty, with a selection of only 4-5 kinds of cookies. “This is where we came for special occasions – to get the best Marochinos cookies”. Marochinos is, as I’ve discovered later, the Ladino word for what we now know to be Almond cookies. “we are using only a certain kind of almond that is best for making these cookies. Because the cookie is flourless, the almond flavor is dominant and very important. We use raw almonds, soak it over night and peel it one by one, as I am doing now”. Which explained the piles. Because of the long, manual procedure, the cookies were kinda pricey so we each started with just one to taste. I will never forget my surprise when I took a bite into it; I didn’t really expect to like it, not as much as I did anyway. It was phenomenal. Dense but yet airy, sweet and scented… I knew I had to figure out how to make these. MAROCHINOS//AKA MACAROONS Makes around 30 cookies; this recipe requires a stand mixer.  From the pantry 8 oz almond paste 6 oz sugar 1 oz confectioners’ sugar 2 fl oz egg whites (2 large eggs should yield that) For Show: a little more confectioners’ sugar, to sprinkle decorating options: candied cherries, pine nuts IMG_3303 Get Mixin’:

  1. Cut almond paste to roughly 1-inch pieces.
  2. Combine with the sugars in a stand up mixer, using the paddle attachment. Mix on very low speed for 2 minutes.
  3. Lightly whisk the egg whites to break it. Turn the mixer speed a little higher and add the egg whites in 3 additions, scraping the bowl between additions. Mix until the batter unifies.
  4. For best results, put in a closed container and allow to age in the fridge overnight. Nothing will happen if you decide to bake it straight away though J
  5. Prepare a sheet tray with some parchment. Put the batter is a pastry bag with a ½-3/4 inch tip (you can spoon it too, it will just look different). Pipe / spoon batter onto the tray, leaving 1’’ around each cookie.
  6. Using a damp cloth / water spray, moisten the top of the cookies. Sprinkle with confectioners’ sugar. You can decorate it with sliced candied cherries, pine nuts etc.
  7. Bake at 375 for about 10-11 minutes, or until puffed and light-golden. Do not over bake – it will make the cookie dense and sticky. Cool before you try to take it off the tray; it tends to be very delicate when warm.

** Tip: These sweeties tend to stick to the paper. Don’t worry! When cool, lift the paper up and wet the sheet tray with a little bit of water, using wet hands. Wait 2 minutes and it will come off like a charm. IMG_3305

Nutella, Pretzels and Shortbread. This is gonna be good

So this week was the Jewish holiday Purim. It’s the equivalent of Christian Halloween Costume wise. Unlike Halloween – there’s no trick-or-treating, but we have something else: it’s a mitzvah to drink until you drop. Yes, you’re reading correctly. Gotta love this holiday.

HOLIDAY TRADITIONS
Another thing about this holiday is that it’s customary to give your friends and family a goody-bag filled with candy and the traditional cookie – Hamantaschen, which literally translates as ‘Haman’s ears’ (did you really think we’d let a holiday go by without something to nosh on?). It’s also customary in a large crowd to have a raffle deciding who this goody bag will go to. I can still remember a school table packed with bright yellow, green and red cellophane-wrapped parcels, each with our name on it (noting who made it), and the raffle that followed. My best friend’s mom used to make the best bags, but somehow I was never the one to receive it.

BACK TO THE COOKIES
These are a kind of shortbread cookies filled with all kinds of yummy filings; the traditional version calls for a poppy seed filling, but you can fill it with whatever you want – chocolate, halva, peanut butter, etc. you can go savory too, of course, but this is a whole other discussion… So we’ll stick to the sweet part, if it’s ok with you.
The only thing you should look out for is making sure that it’s thick enough so it wouldn’t leak out of the sides of the cookie which can cause it to open and ruin the whole nicely-shaped-triangle you were working so hard on. The rule is: if you spoon a little on a plate and it keeps its shape – spreading just a little, you’re fine. If it flattens up – not so much. So how do you fix it? All you need is something to absorb the extra liquid.

PRETZEL TALK
Say you want Nutella filling (I know I do). Very runny. But you still want it. What you can do is add a thickening agent – which in this case is much easier than making roux, dissolving cornstarch etc.: to get the desired consistency, an addition of crumbled cookies, day-old pound cake crumbles and so on would work perfectly. In my filling – being a sweet-and-salty gal myself – I decided I want to try adding crumbled pretzel sticks.

IMG_3268

BRAND DROPPING
Wow, Snyder’s of Hanover. Great job well done on your recipe tab. I didn’t quite expect it, given that the snacks category tends to sometime overlook the foodie recipe-searching community, but you did great with all the different options. The site goes from your usual suspects of pretzel bread-crumb alternatives through finger food to main course and dessert with lots of navigation options, and offers many recipes that actually include the product itself. Lots of topping-things involved, but many variations, so I’ll give them that. I also looked at Rold Gold’s website – another FritoLay brand (remember them from last time?). I guess being part of a larger group of brands can sometimes mean being in the background. There were only 5 recipes dedicated to the brand, 3 of which did not involve the use of the product itself. Maybe FritoLay considers the brand a ‘Milking Cow’ and does not want to invest too much into it. Whatever the reason, it could definitely use some serious touch ups.

RECIPE AWAY
*You can always not-use any equipment, but it’s just simpler in this recipe to use a mixer and a food processor. In any way, both methods are described.
*make sure you’re not stressed with time because the dough needs to rest in the fridge for at least 30 minutes to get its act together.

Nutella and Pretzel Hamantaschen
Makes about 50 cookies, depends on the diameter of cookie cutter 🙂

From the pantry
For the dough, all in room temp:
3 cups (13.5 oz) AP flour
1 tsp baking powder
1/4 tsp salt
1 cup (4 oz) confectioners sugar
1 stick and 6 TBS (6.5 oz) butter
1 L egg + 1 yolk
1 tsp vanilla extract

For the filling:
1 cup Nutella spread
1/2 pack – about 4-5 oz of any kind of hard pretzels
1/2 tsp cinnamon (optional)
*Piping bag would be nice if you have any.

For show
Some confectioners sugar to sprinkle

Get Mixin’

Make the dough: 

  1. If you have a mixer (lucky you, what luxury to have in a tiny apartment!), start by beating the butter and sugar with the pedal attachment. If you don’t, don’t worry, just use a wooden spoon. Try going slow because the sugar is so light it will fly right out of the bowl (and here goes your measuring. And your recent cleaning efforts).
  2. Add the egg + yolk, and the vanilla. Mix until well combined.
  3. Add the flour and beat until incorporated (if you’re doing it manually and it starts getting harder with the wooden spoon, you can use your hands and knead it a little).
  4. Wrap in plastic and allow to rest in the fridge for at least 30 minutes.

Make the filling:

  1. If you have a small food processor, grind the pretzels to very small pieces. You can leave some larger pieces for texture. If you don’t, take 2 (clean!) nylon bags, double wrap the pretzels and smack the hell out of the bag until the pretzels give up. Good way to let out some of those aggressions.
  2. Put the Nutella and cinnamon in a bowl. Gradually add the pretzels. Don’t get it all in at once – you might end up with really condense texture. Remember the test? Spoon some to a place and see if it spreads just a little. If you have a piping bag – fill it up with the filling. No need for a special tip.
  3. Heat the oven to 350f.
  4. Roll the dough to 1/3″ thickness. Use a round cookie cutter or a regular cup to make rounds out of the dough. I used an 8″ cutter. Collect the dough leftovers to roll again and repeat the process.
  5. Using a spoon or a piping bag, put about 1 tsp of filling on each round. Fold the dough to make a triangle and pinch the ends with your fingers.
  6. Arrange on a sheet tray with about 1’’ space between the cookies.
  7. Bake on the upper rack for about 15-18 minutes until the cookies are golden (my oven took full 18 minutes, but I know other ovens are probably better and require less time).
  8. Share with all of your friends, and don’t forget the cellophane!

IMG_3273